In today’s tutorial, you will learn how to implement a TimePicker in Kotlin Compose Multiplatform (KMP/KMM) for both Android & iOS platforms. We are implementing a platform-specific time picker that works with common compose code. On an Android device, it launches the Android native date picker dialog, while on iOS, it launches the native iOS date picker dialog.
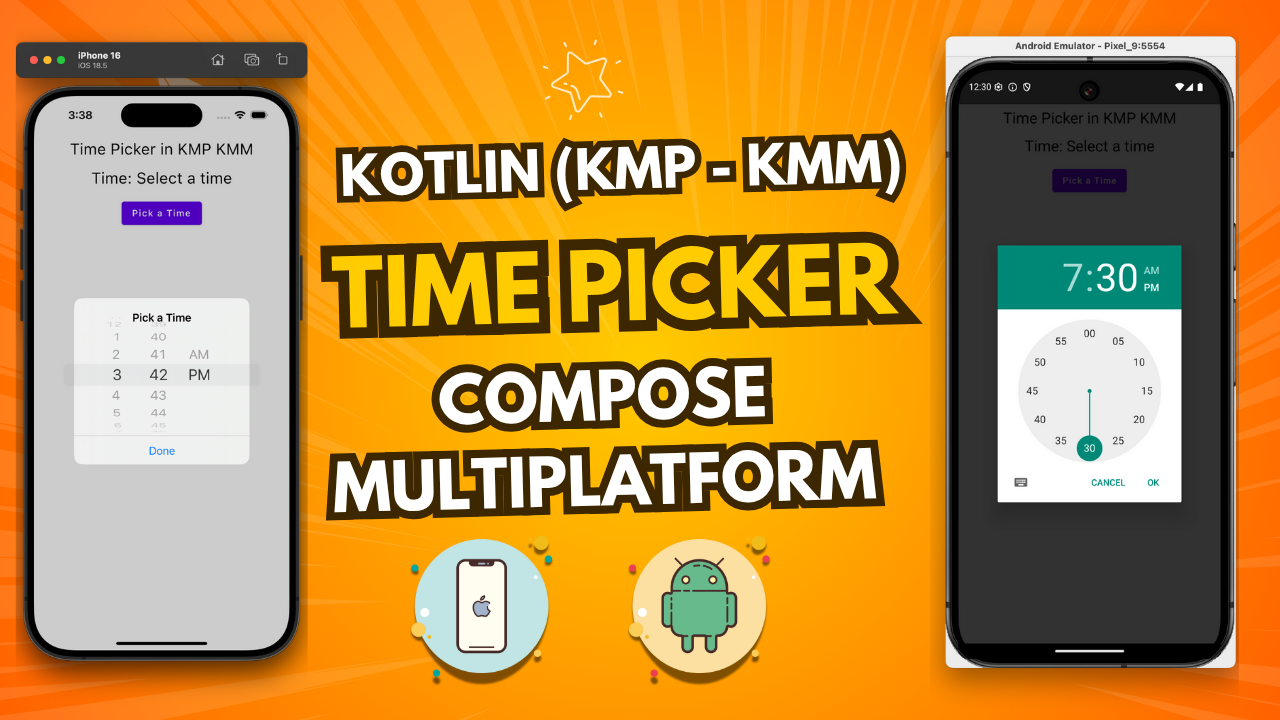
TimePicker in Kotlin Compose Multiplatform (KMP/KMM):
One of the common hurdles developers face when diving into Kotlin Multiplatform (KMP) and Compose Multiplatform is handling UI components that don’t have a built-in, cross-platform equivalent. A prime example is the TimePicker. While essential for many apps, there’s no common TimePicker() Composable you can drop into your shared code.
So, what’s the solution? We lean on the core strength of KMP: accessing native platform APIs.
In this guide, we’ll walk you through the powerful expect/actual pattern to create a seamless, native TimePicker experience for both Android and iOS users. You’ll get the best of both worlds: a shared UI logic in Compose Multiplatform and the familiar, platform-specific UI that users expect.
Start coding for the app:
1. Add kotlinx-datetime dependency:
Open your project’s composeApp -> build.gradle.kts file and put “kotlinx-datetime” dependency in commonMain.dependencies { } block. Please SYNC the project after this.
|
1 2 3 |
// Date time dependency implementation("org.jetbrains.kotlinx:kotlinx-datetime:0.7.0") |
2. Android-specific TimePicker implementation:
1. Open your project’s APP -> composeApp -> src -> androidMain -> kotlin -> packageName -> MainActivity.kt file.
2. Implement pickTime() method.
|
1 2 3 4 5 6 7 8 9 10 11 12 13 14 15 16 17 18 19 20 21 |
// Android-specific implementation actual fun pickTime(context: Any?, onTimePicked: (String) -> Unit) { // Ensure context is of type Context if (context !is Context) return val calendar = Calendar.getInstance() val hour = calendar.get(Calendar.HOUR_OF_DAY) val minute = calendar.get(Calendar.MINUTE) // Android-specific TimePickerDialog TimePickerDialog( context, { _, selectedHour, selectedMinute -> val time = String.format(Locale.getDefault(),"%02d:%02d", selectedHour, selectedMinute) onTimePicked(time) }, hour, minute, false // is24HourView ).show() } |
Code explanation:
- actual fun pickTime(…): The actual keyword fulfills the promise made by expect. The compiler now knows this is the official Android version of the pickTime function.
- if (context !is Context) return: This is a crucial safety check. To show a dialog on Android, you absolutely need a Context. We check if the Any? object we received is actually a Context. If not, we exit the function to prevent a crash.
- val calendar = …: We get an instance of Calendar to fetch the current hour and minute. This is used to initialize the TimePickerDialog with the current time, which is a standard user experience.
- TimePickerDialog(…): This creates an instance of the standard, native Android time picker dialog.
- context: The required Android context.
- { _, selectedHour, selectedMinute -> … }: This is the listener that gets executed when the user clicks the “OK” button in the dialog. Inside the listener, String.format(…) is used to format the integer hour and minute into a two-digit string (e.g., 7 becomes 07, 15 stays 15), ensuring a consistent “HH:mm” format.
- onTimePicked(time): This is the key moment! We call the callback function we received as a parameter and pass the newly formatted time string. This sends the data back to our shared UI.
- hour, minute: The initial time to display in the picker.
- false: This is for the is24HourView parameter. false means it will show a 12-hour clock with an AM/PM toggle.
- .show(): This final call displays the dialog to the user.
3. Pass the Android context in the Main Activity:
|
1 2 3 4 5 6 7 8 |
class MainActivity : ComponentActivity() { override fun onCreate(savedInstanceState: Bundle?) { super.onCreate(savedInstanceState) setContent { App(this) } } } |
Complete source code of MainActivity.kt file:
|
1 2 3 4 5 6 7 8 9 10 11 12 13 14 15 16 17 18 19 20 21 22 23 24 25 26 27 28 29 30 31 32 33 34 35 36 37 38 39 40 41 42 43 |
package com.app.test import android.app.DatePickerDialog import android.app.TimePickerDialog import android.content.Context import android.os.Bundle import androidx.activity.ComponentActivity import androidx.activity.compose.setContent import androidx.compose.runtime.Composable import androidx.compose.ui.tooling.preview.Preview import java.util.Calendar import java.util.Locale class MainActivity : ComponentActivity() { override fun onCreate(savedInstanceState: Bundle?) { super.onCreate(savedInstanceState) setContent { App(this) } } } // Android-specific implementation actual fun pickTime(context: Any?, onTimePicked: (String) -> Unit) { // Ensure context is of type Context if (context !is Context) return val calendar = Calendar.getInstance() val hour = calendar.get(Calendar.HOUR_OF_DAY) val minute = calendar.get(Calendar.MINUTE) // Android-specific TimePickerDialog TimePickerDialog( context, { _, selectedHour, selectedMinute -> val time = String.format(Locale.getDefault(),"%02d:%02d", selectedHour, selectedMinute) onTimePicked(time) }, hour, minute, false // is24HourView ).show() } |
3. iOS-specific TimePicker implementation:
1. Open your project’s APP -> composeApp -> src -> iosMain -> kotlin -> packageName -> pickTime.kt file. You have to create a new file named pickTime.kt.
|
1 2 3 4 5 6 7 8 9 10 11 12 13 14 15 16 17 18 19 20 21 22 23 24 25 26 27 28 29 30 31 32 33 34 35 36 37 38 39 40 41 42 43 44 45 46 47 48 49 50 51 52 53 54 55 56 57 58 59 60 |
package com.app.test import platform.Foundation.NSDateFormatter import platform.UIKit.UIAlertAction import platform.UIKit.UIAlertActionStyleDefault import platform.UIKit.UIAlertController import platform.UIKit.UIAlertControllerStyleAlert import platform.UIKit.UIApplication import platform.UIKit.UIDatePicker import platform.UIKit.UIDatePickerMode import platform.UIKit.UIDatePickerStyle actual fun pickTime(context: Any?, onTimePicked: (String) -> Unit) { val timePicker = UIDatePicker().apply { datePickerMode = UIDatePickerMode.UIDatePickerModeTime preferredDatePickerStyle = UIDatePickerStyle.UIDatePickerStyleWheels // Direct wheel-style picker translatesAutoresizingMaskIntoConstraints = false } val alertController = UIAlertController.alertControllerWithTitle( title = "Pick a Time", message = "\n\n\n\n\n\n\n", preferredStyle = UIAlertControllerStyleAlert ) alertController.view.addSubview(timePicker) timePicker.centerXAnchor.constraintEqualToAnchor(alertController.view.centerXAnchor).active = true timePicker.topAnchor.constraintEqualToAnchor( alertController.view.topAnchor, constant = 10.0 ).active = true timePicker.widthAnchor.constraintEqualToAnchor( alertController.view.widthAnchor, constant = 0.0 ).active = true // Add a "Done" button alertController.addAction( UIAlertAction.actionWithTitle( title = "Done", style = UIAlertActionStyleDefault ) { _ -> val formatter = NSDateFormatter().apply { dateFormat = "HH:mm" } val selectedTime = formatter.stringFromDate(timePicker.date) onTimePicked(selectedTime) } ) // Present the alert UIApplication.sharedApplication.keyWindow?.rootViewController?.presentViewController( alertController, animated = true, completion = null ) } |
Code explanation:
- actual fun pickTime(…): Just like on Android, this actual function fulfills the expect contract for iOS.
- val timePicker = UIDatePicker().apply {…}: This creates an instance of the native iOS picker view.
- datePickerMode = …Time: Configures it to show only time, not a date.
preferredDatePickerStyle = …Wheels: Sets the visual style to the classic rotating wheels. - val alertController = …: In iOS, you typically present a picker inside another container. UIAlertController is a common choice. The message = “\n\n…” is a well-known trick to create empty space inside the alert where we can place our timePicker.
- alertController.view.addSubview(timePicker): This adds the picker view as a child of the alert view.
- Constraints (.centerXAnchor, .topAnchor etc.): This is programmatic UI layout in iOS (AutoLayout). These lines center the timePicker horizontally and position it near the top of the alert’s view.
- alertController.addAction(…): This adds a “Done” button to the alert.
- val formatter = NSDateFormatter(): This is the iOS tool for converting dates and times to and from strings. We configure it with dateFormat = “HH:mm” to get our desired 24-hour format.
- formatter.stringFromDate(timePicker.date): This takes the selected date/time object from the picker and converts it into our formatted string.
- onTimePicked(selectedTime): The callback is invoked, sending the formatted time string back to our shared KMP code.
- …presentViewController(…): This is the final command that finds the currently active screen (rootViewController) and presents our alert with the time picker on top of it.
2. Now we have to pass null at the place of context in APP -> composeApp -> src -> iosMain -> kotlin -> packageName -> MainViewController.kt file.
|
1 2 3 4 5 |
package com.app.test import androidx.compose.ui.window.ComposeUIViewController fun MainViewController() = ComposeUIViewController { App(null) } |
4. Common TimePicker Implementation:
1. Open your project and create a file: APP -> composeApp -> src -> commonMain -> kotlin -> packageName -> time_picker.kt file.
|
1 2 3 |
package com.app.test expect fun pickTime(context: Any?, onTimePicked: (String) -> Unit) |
Code explanation:
- expect fun pickTime(…): This is the core of the KMP pattern.
The expect keyword is a promise. It tells the KMP compiler, “I am defining the signature of a function here, but not its implementation. I expect that every platform I compile for (like Android and iOS) will provide its own actual implementation of this exact function.” - context: Any?: This parameter is a generic placeholder. In commonMain, we don’t know about Android’s Context or iOS’s UIViewController. So we use Any?, the supertype of all types in Kotlin, to create a flexible parameter that can accept whatever platform-specific object we need to pass in later. The ? makes it nullable, as iOS might not need it.
- onTimePicked: (String) -> Unit: This is a high-order function, also known as a callback. It’s a function that we pass as a parameter. Its purpose is to send data back from the platform-specific code to our common UI code. Once the native Android or iOS picker selects a time, it will call this function, passing the selected time as a String.
5. Common TimePicker Implementation in App.kt file:
|
1 2 3 4 5 6 7 8 9 10 11 12 13 14 15 16 17 18 19 20 21 22 23 24 25 26 27 28 29 30 31 32 33 34 35 36 37 38 39 40 41 42 43 44 45 46 47 48 49 50 51 52 53 54 55 56 57 58 59 60 61 62 63 64 65 66 67 |
package com.app.test import androidx.compose.foundation.layout.* import androidx.compose.material.* import androidx.compose.runtime.* import androidx.compose.ui.Modifier import androidx.compose.ui.Alignment import androidx.compose.ui.graphics.Color import androidx.compose.ui.text.TextStyle import androidx.compose.ui.text.style.TextAlign import androidx.compose.ui.unit.dp import androidx.compose.ui.unit.sp import kotlinx.datetime.LocalTime @Composable fun App(context: Any?) { MaterialTheme { var selectedTime by remember { mutableStateOf("Select a time") } Column( modifier = Modifier .fillMaxSize() .padding(8.dp), verticalArrangement = Arrangement.Top, horizontalAlignment = Alignment.CenterHorizontally ) { Text( "Time Picker in KMP KMM", modifier = Modifier.fillMaxWidth(), style = TextStyle(color = Color.Black, fontSize = 24.sp), textAlign = TextAlign.Center ) Spacer(modifier = Modifier.height(16.dp)) // Date Picker Text( text = "Time: ${selectedTime.to12HourFormat()}", style = TextStyle(color = Color.Black, fontSize = 24.sp), ) Spacer(modifier = Modifier.height(16.dp)) Button(onClick = { pickTime(context) { time -> selectedTime = time } }) { Text("Pick a Time") } } } } fun String.to12HourFormat(): String { return try { val localTime = LocalTime.parse(this) val hour = when { localTime.hour == 0 -> 12 localTime.hour > 12 -> localTime.hour - 12 else -> localTime.hour } val amPm = if (localTime.hour < 12) "AM" else "PM" "${hour.toString().padStart(2, '0')}:${localTime.minute.toString().padStart(2, '0')} $amPm" } catch (e: Exception) { this } } |
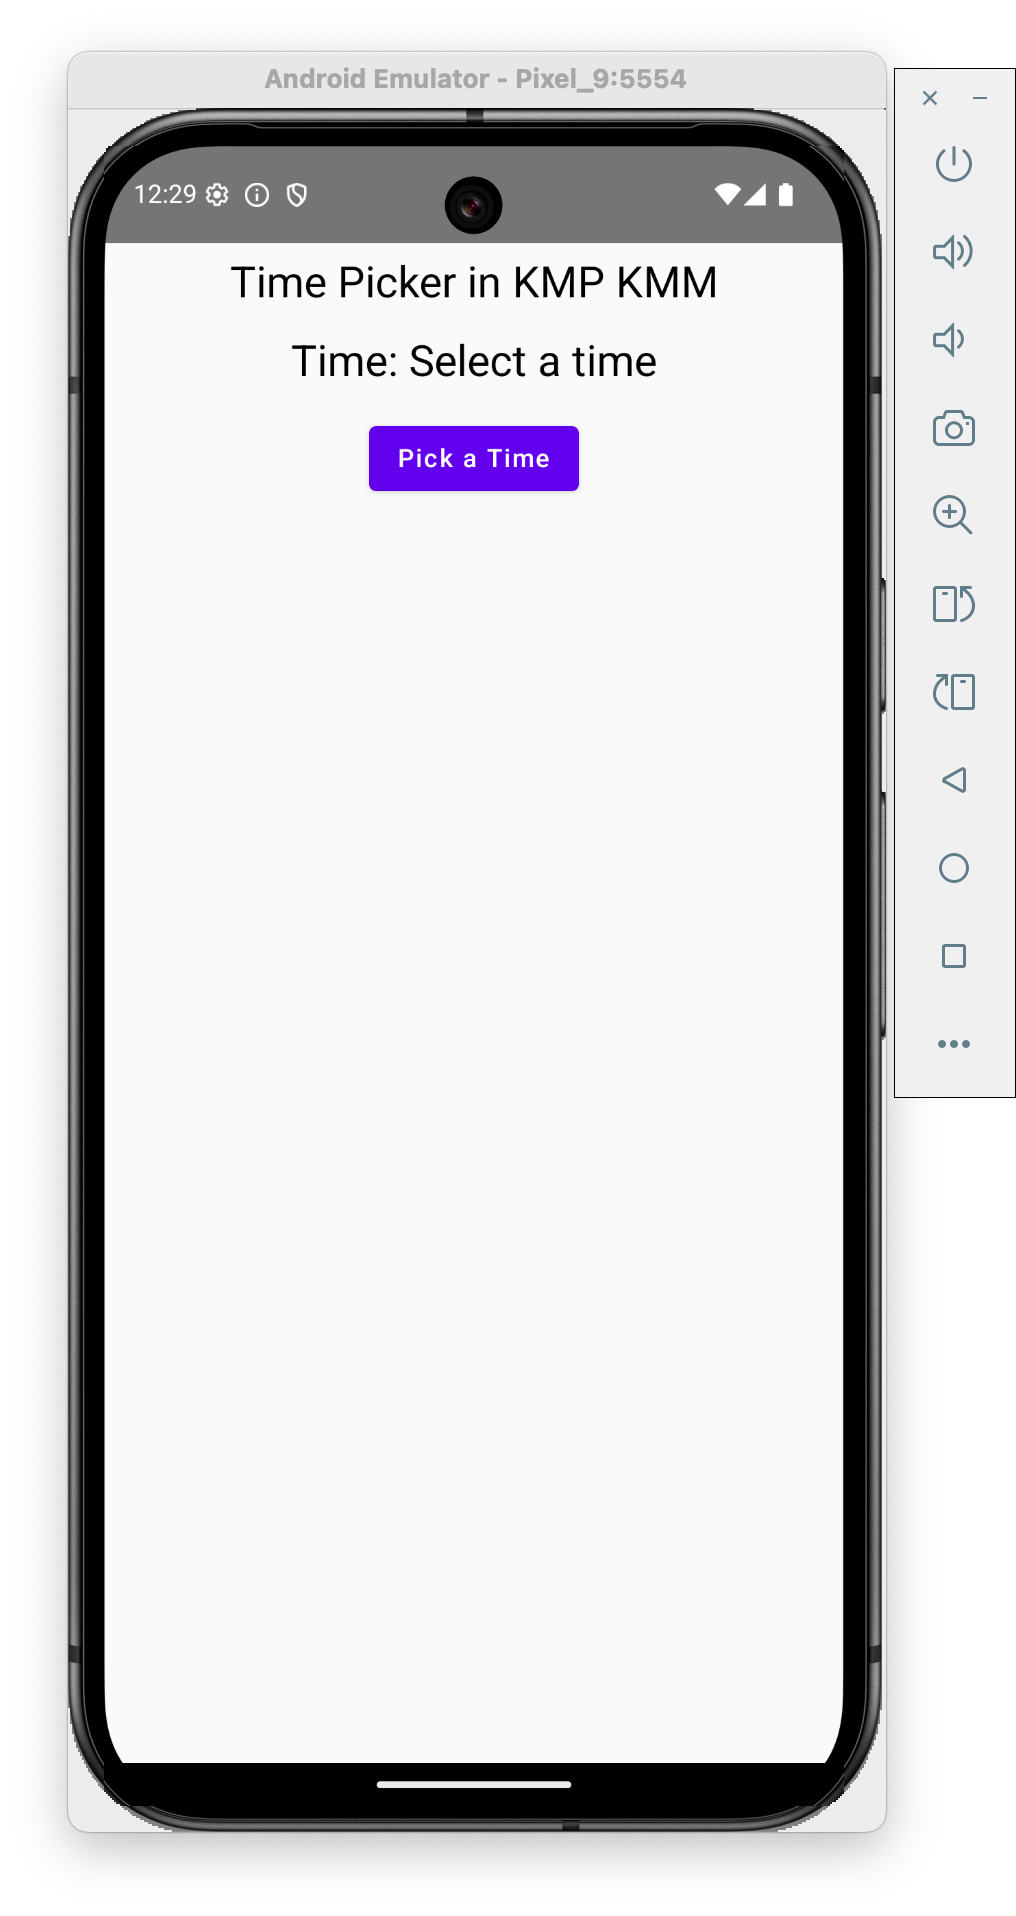
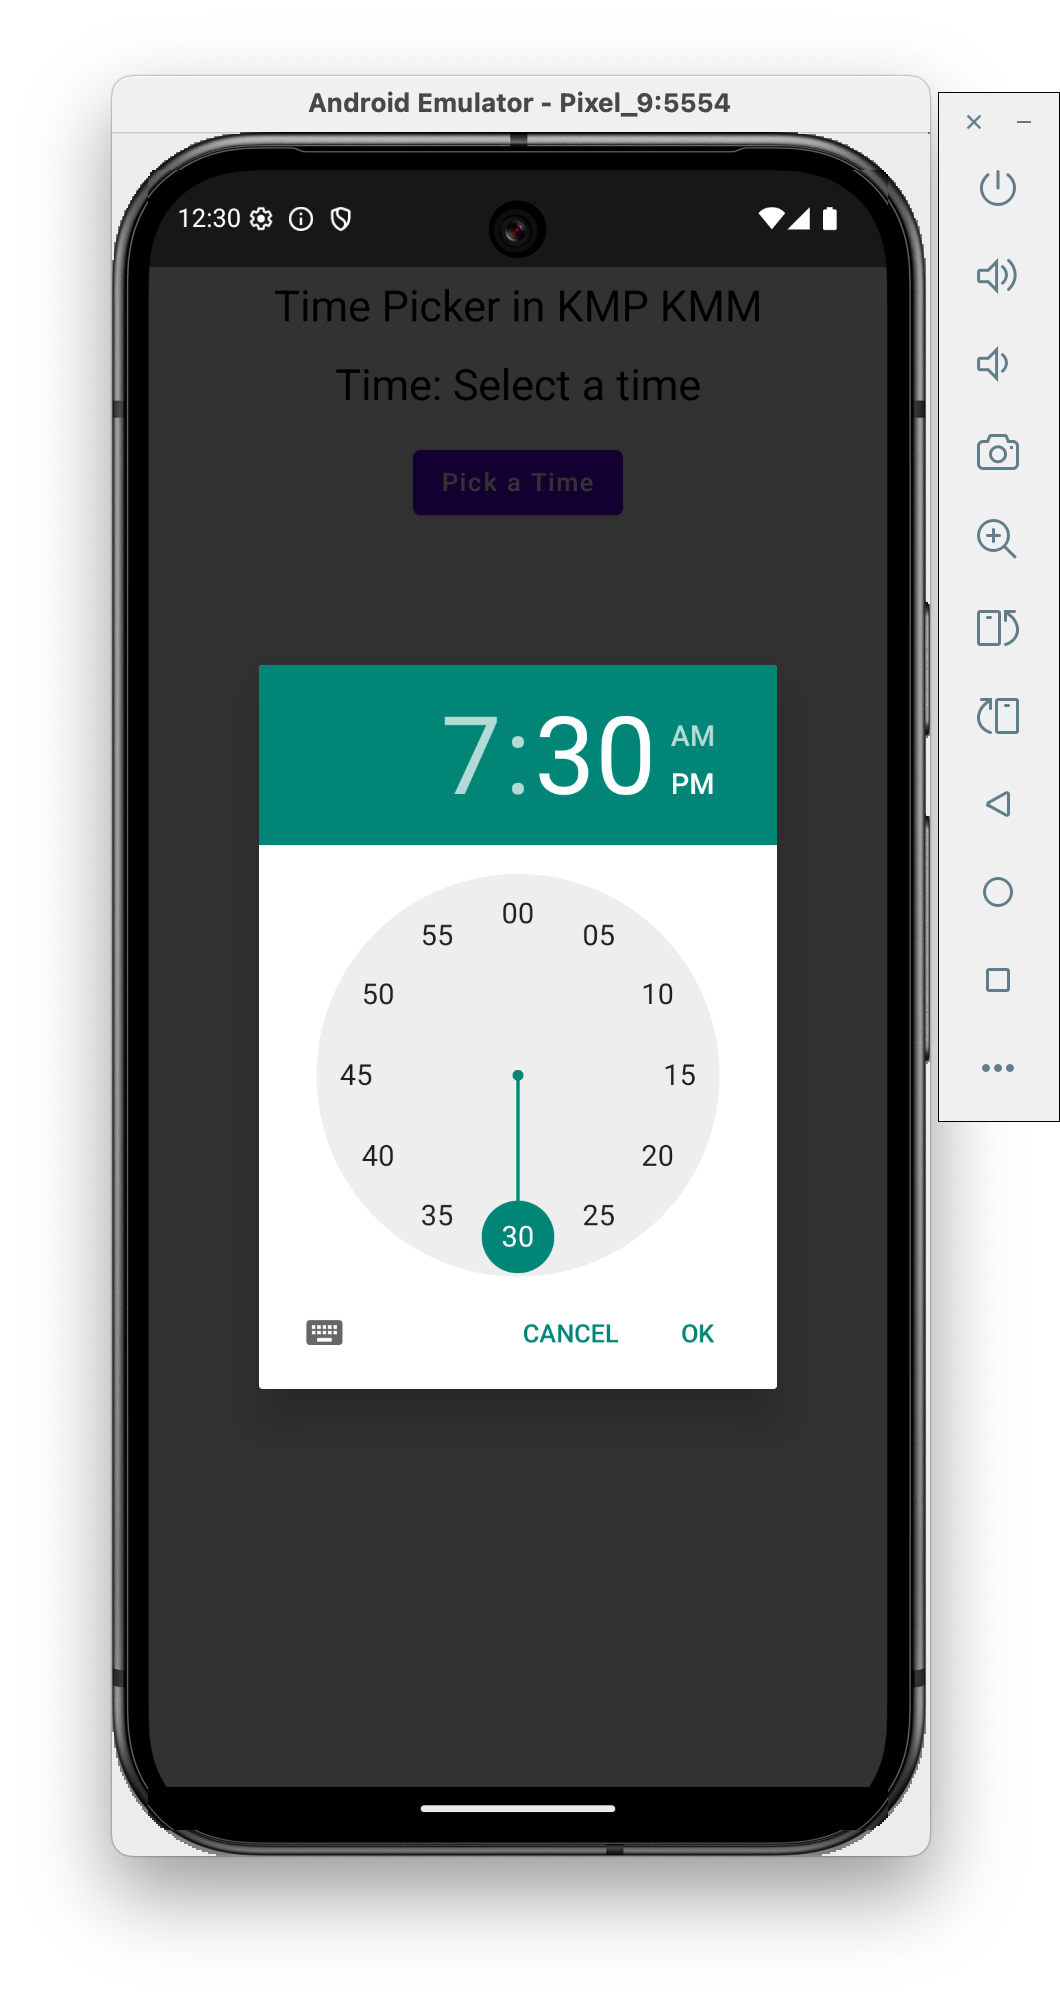
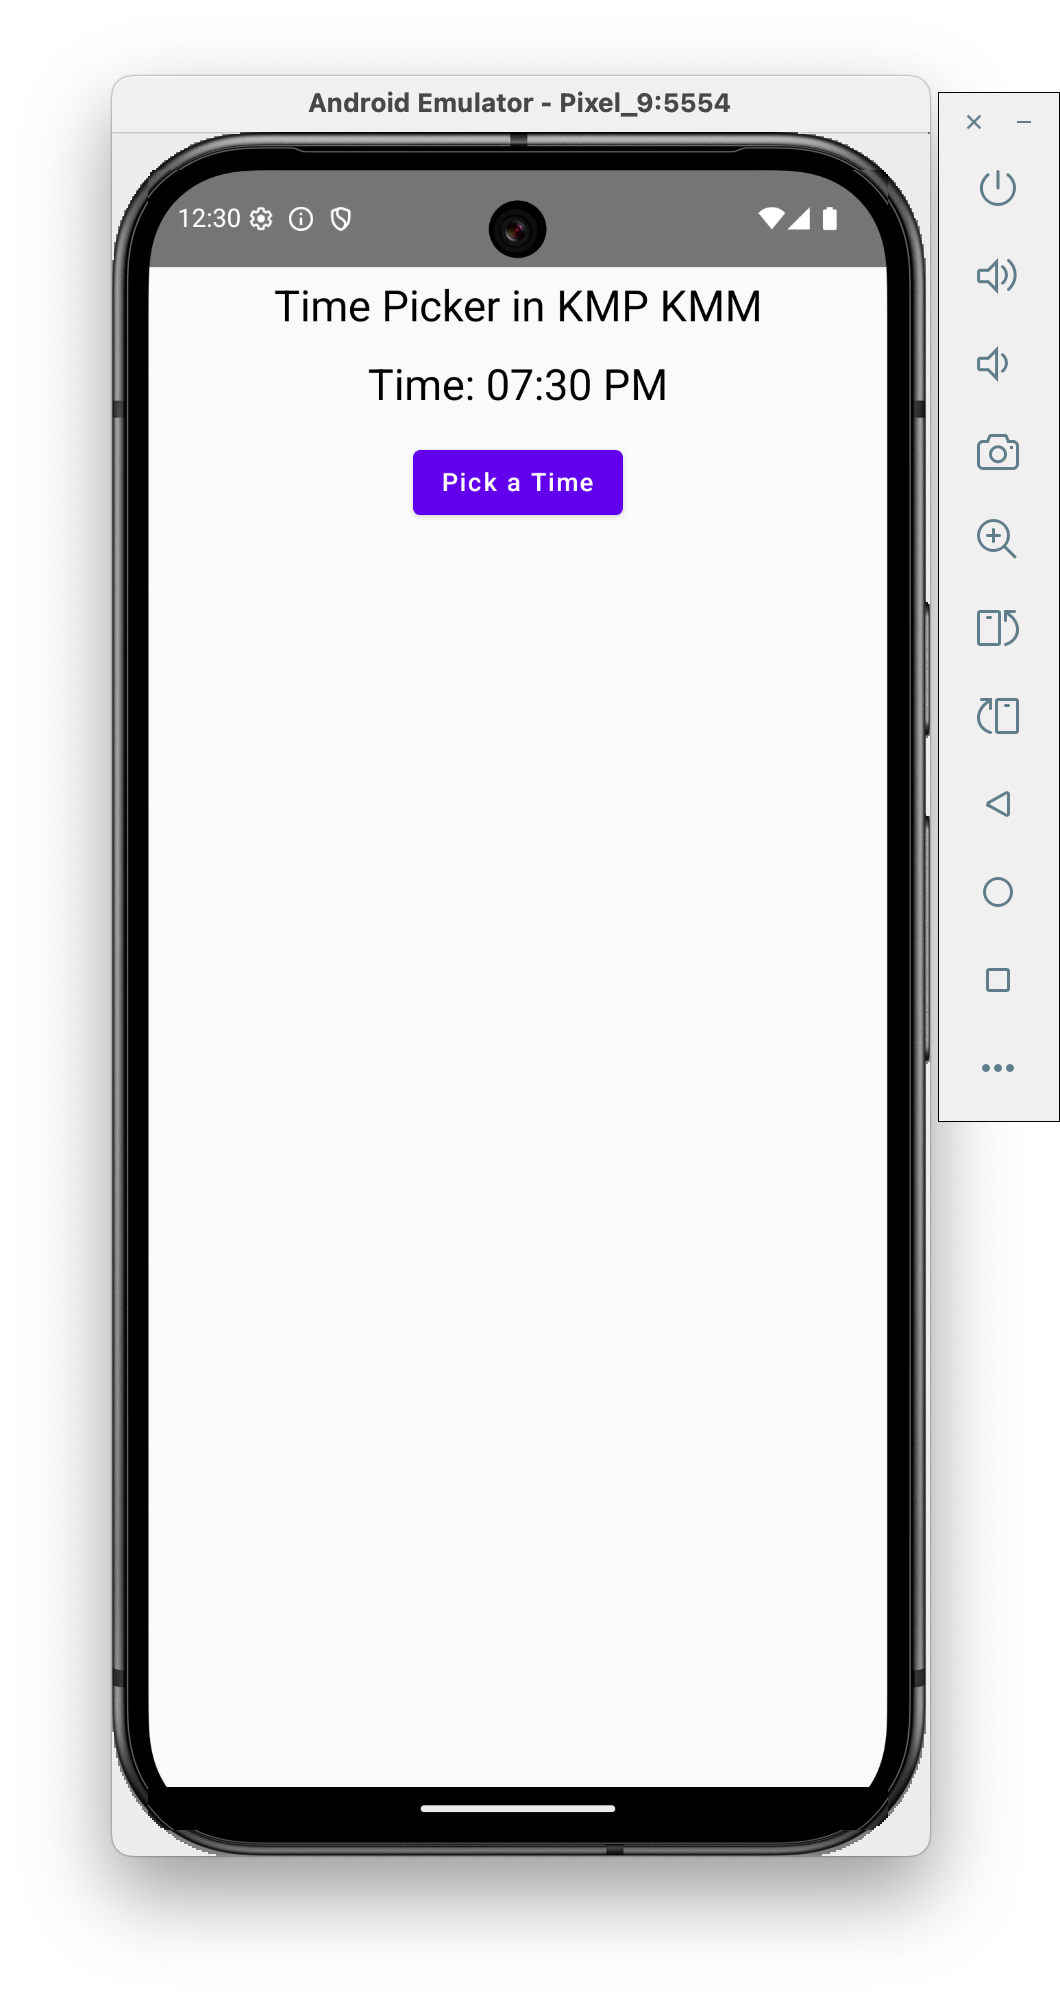
Screenshots on an Android device:
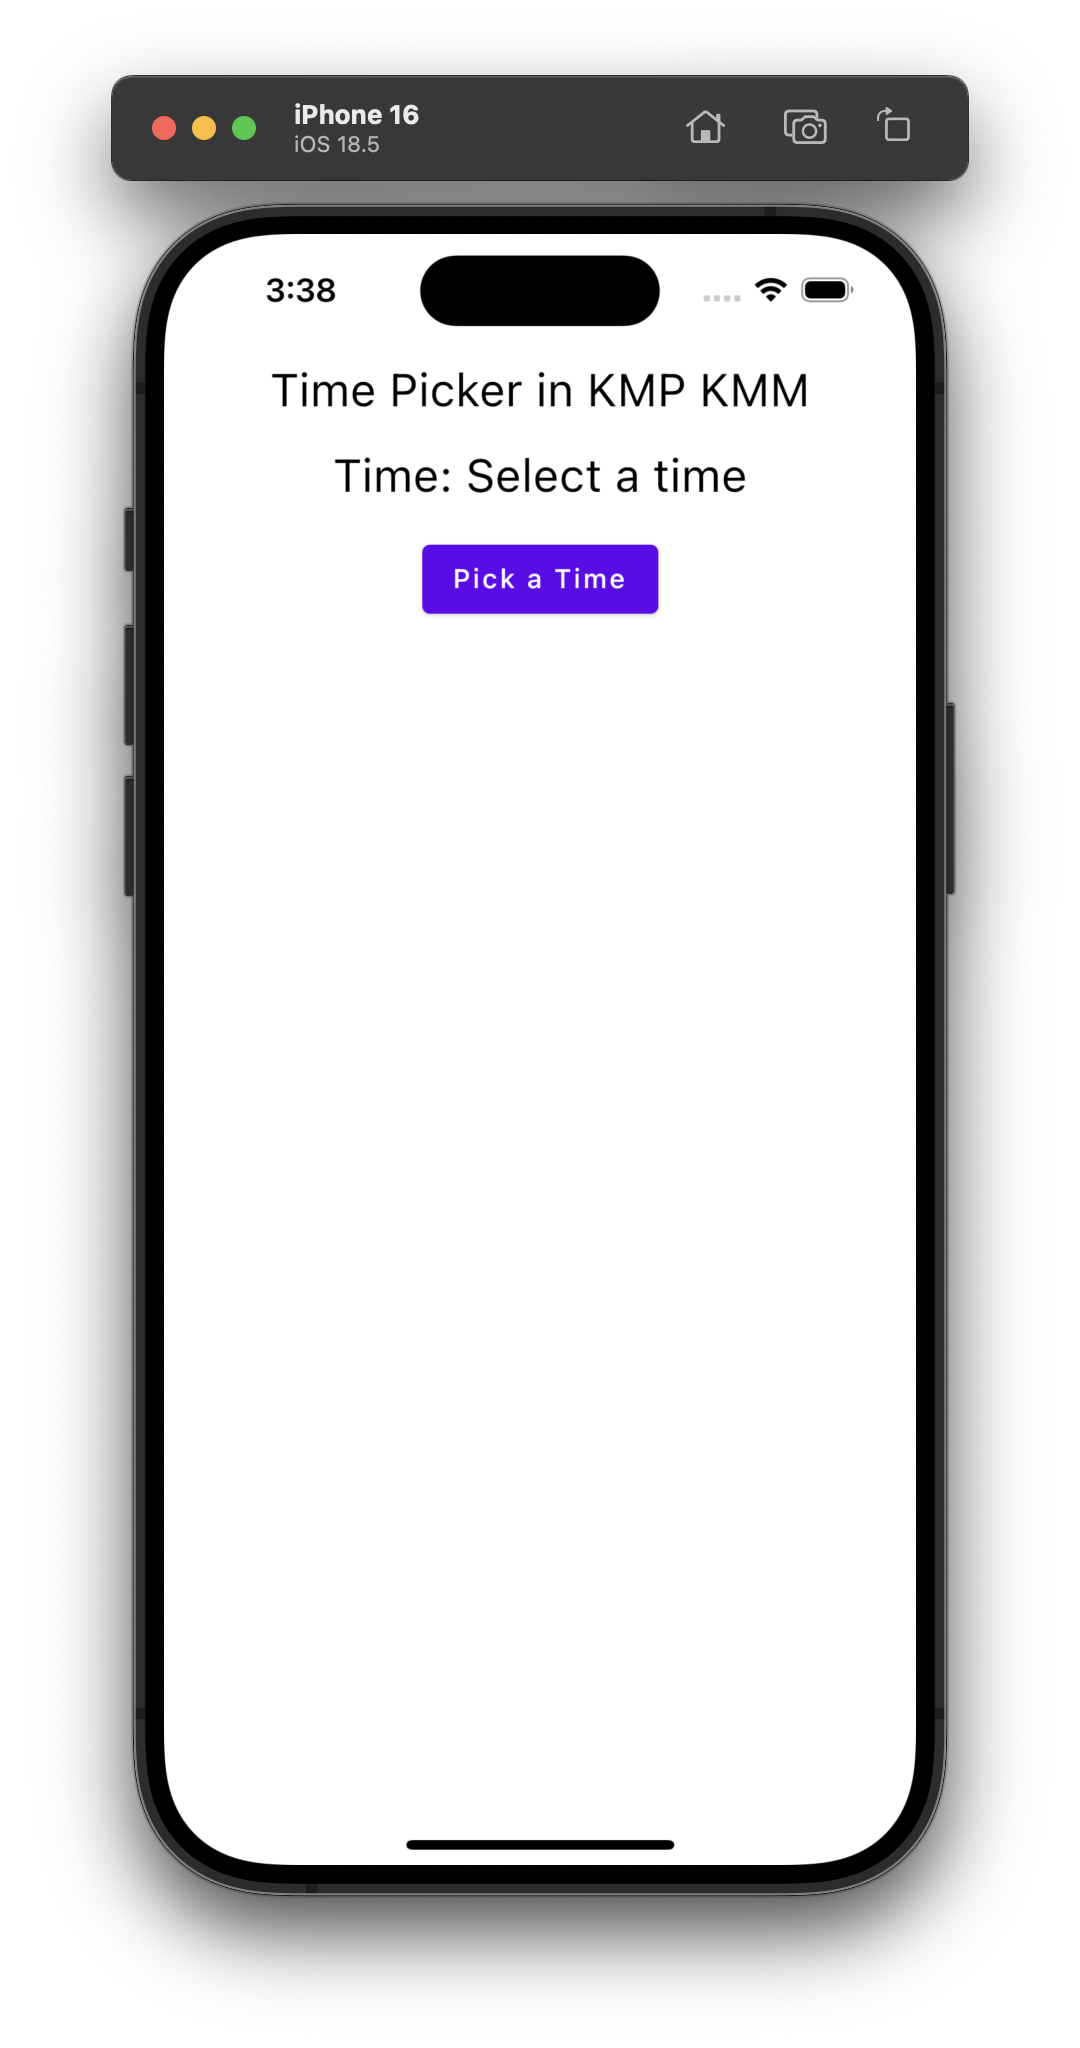
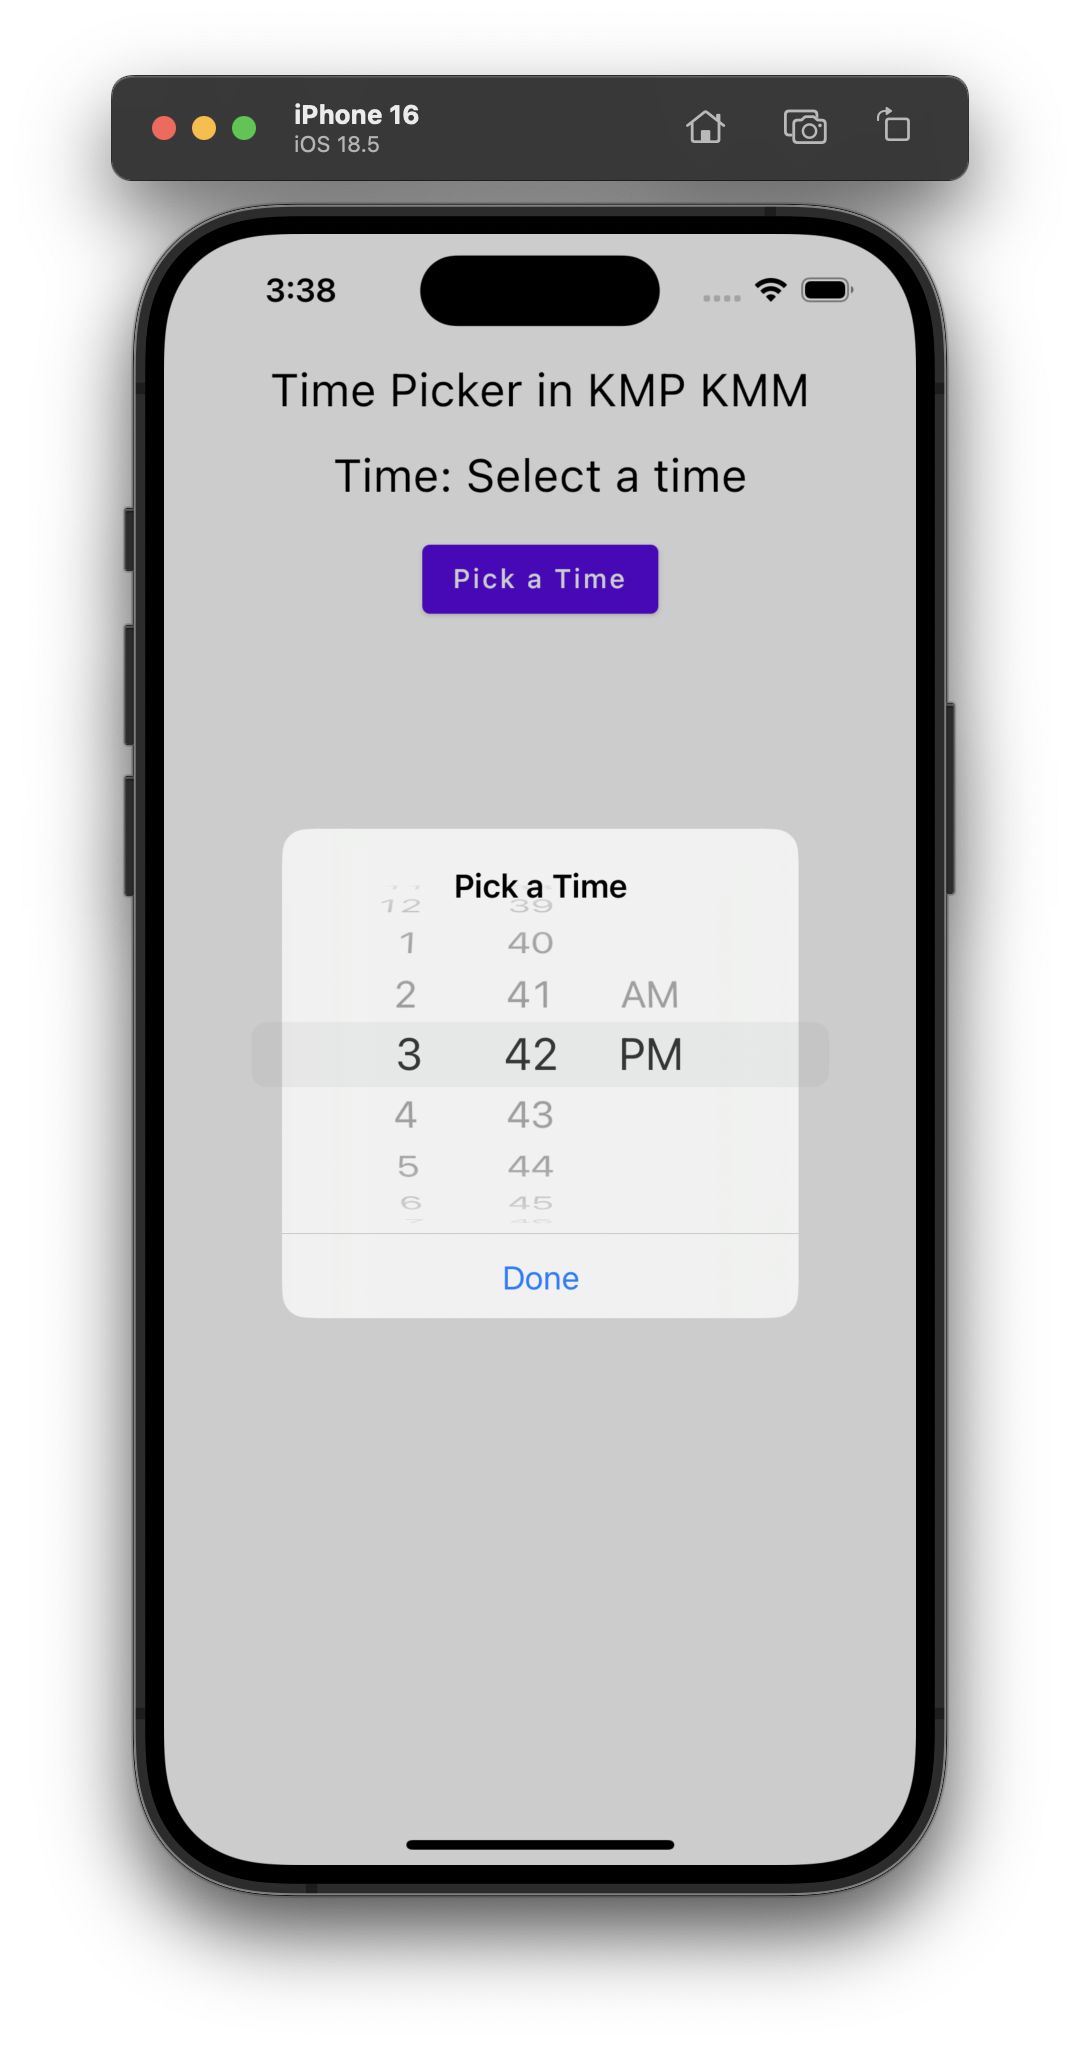
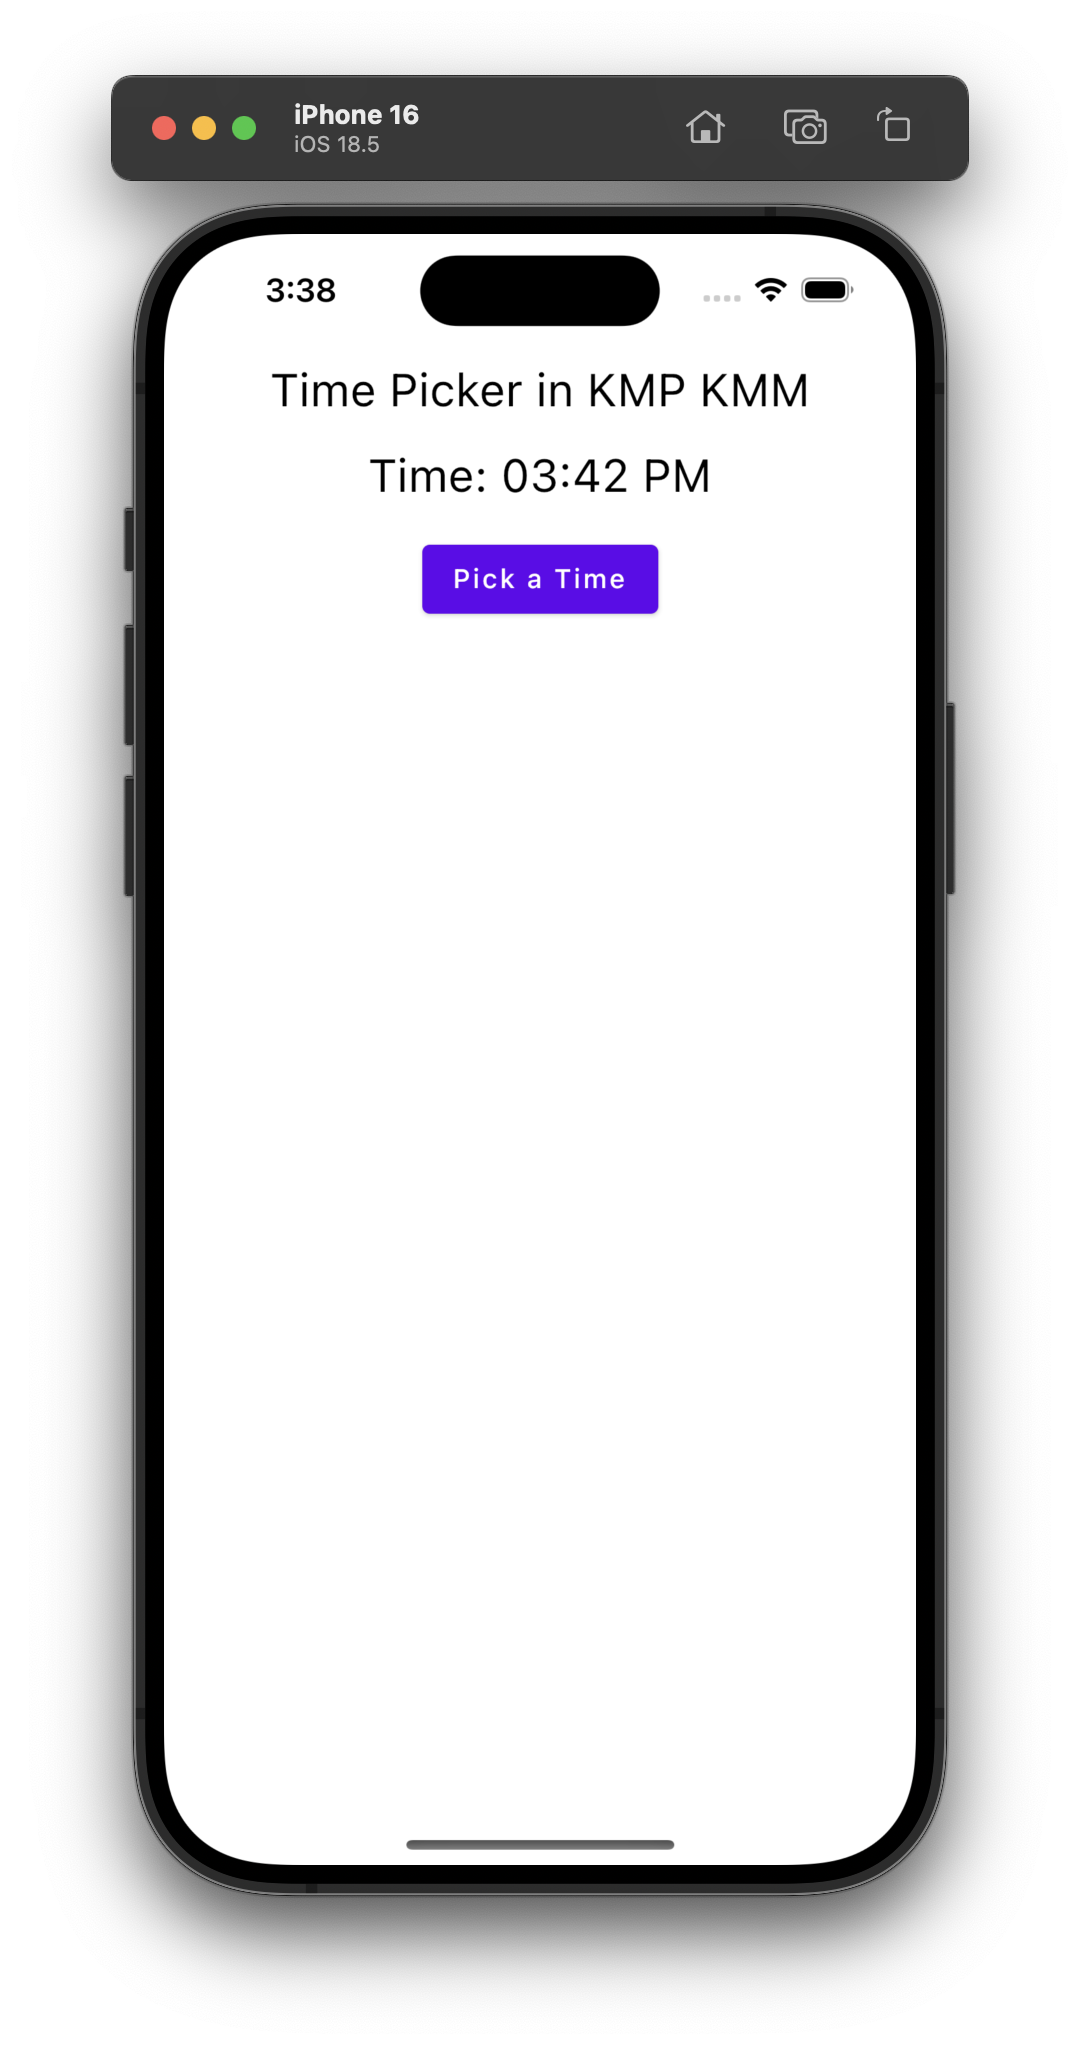
Screenshots on an iOS device: